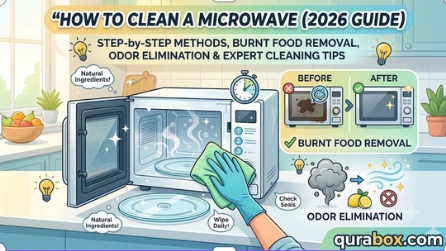
How to Clean a Microwave (2026): Easy Cleaning Methods, Burnt Food Removal, Odor Elimination, Deep Cleaning Steps & Maintenance Tips
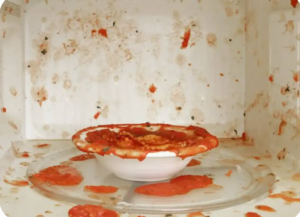
We’ve all experienced it: you heat up a bowl of tomato soup or a plate of pasta leftovers, walk away for a split second, and return to a miniature volcanic explosion. The interior walls are lined with baked-on, crusty splatters, and a stubborn smell fills your kitchen.
Scrubbing at these hardened messes with brute force is not only exhausting, but it can also permanently scratch the interior lining of your appliance.
The truth is, you don’t need harsh chemical sprays or heavy-duty abrasive pads to restore your appliance. By using basic household staples like lemons, white vinegar, and baking soda strategically, you can let chemistry do 95% of the heavy lifting for you.
This comprehensive guide breaks down the absolute fastest, most effective methods to deep clean your microwave, remove burnt-on carbon crusts, neutralize foul odors, and maintain your machine for peak efficiency.
Why Regular Microwave Cleaning Matters
📷 Image Suggestion: Dirty microwave vs clean microwave side-by-side comparison.
Many people view microwave cleaning as a cosmetic task. In reality, it affects:
- Food safety
- Appliance efficiency
- Odor control
- Energy consumption
- Microwave lifespan
Risks of a Dirty Microwave
| Problem | Impact |
|---|---|
| Grease buildup | Reduced efficiency |
| Food splatters | Bad odors |
| Carbonized food | Fire risk |
| Bacteria growth | Hygiene concerns |
| Door seal contamination | Poor performance |
Natural Cleaners vs Commercial Microwave Cleaners
📷 Image Suggestion: Natural ingredients vs commercial spray bottles.
| Factor | Natural Cleaners | Commercial Cleaners |
|---|---|---|
| Cost | Low | Higher |
| Safety | Excellent | Varies |
| Food Contact | Safe | Requires rinsing |
| Odor | Pleasant | Chemical |
| Eco-Friendly | Yes | Sometimes |
Supplies You’ll Need to Clean a Microwave BUY AMAZON
📷 Image Suggestion: Lemon, vinegar, baking soda, microfiber cloth, bowl, sponge
Basic Cleaning Kit
- Fresh lemons
- White vinegar
- Baking soda
- Warm water
- Microfiber cloth
- Non-scratch sponge
- Dish soap
- Rubber gloves (optional)
1. The Power of Vapor: The Easiest Steam Cleaning Methods
The golden rule of cleaning a microwave is never scrub cold grime. Instead, you want to use localized humidity and heat to break down the molecular bonds of hardened grease and sugars. This turns a 20-minute scraping chore into a simple 30-second wipe-down.
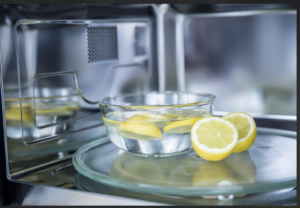
The Citric Acid Steam Method (Using Fresh Lemons)
Lemons contain natural citric acid, which acts as a powerful, mild degreaser while leaving behind a crisp, organic scent that completely masks stale food odors.
The Step-by-Step Execution:
-
Prep the Bowl: Fill a deep, microwave-safe ceramic or glass bowl with exactly 1 cup of tap water.
-
Add the Citrus: Slice a whole lemon in half. Squeeze the juice directly into the water, then drop the remaining halves straight into the bowl.
-
Boil It: Place the bowl inside, close the door, and run the microwave on High Power for 3 to 5 minutes. You want the water to reach a rolling boil so the window completely fogs up with dense steam.
-
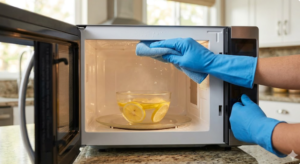
The Hidden Secret (The Rest Period): When the timer rings, do not open the door. Leave it shut for 10 full minutes. This traps the pressurized, acidic steam inside, allowing it to penetrate and liquefy the crusty food particles on the ceiling and walls.
-
The Wipe-Down: Open the door, carefully remove the hot bowl using oven mitts, and lift out the turntable. Take a clean microfiber cloth and effortlessly wipe the interior from top to bottom. The grime will slide right off.
The Acetic Acid Alternative (Using Distilled White Vinegar)
If you don’t have fresh lemons on hand, ordinary white vinegar is an exceptional alternative. The acetic acid in vinegar is highly effective at cutting through slick oil films and sanitizing surfaces.
-
The Ratio: Mix 1 cup of water with 2 tablespoons of white vinegar in a microwave-safe bowl.
-
The Process: Run on high for 3 to 5 minutes, let it trap steam for 10 minutes, and wipe clean.
💡 Pro-Tip: The vinegar smell will be incredibly sharp the moment you open the door, but don’t panic—it dissipates entirely within 5 minutes, carrying stubborn kitchen odors away with it.
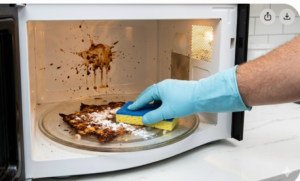
2. Removing Hardened, Burnt-On Food Crud
When food splatters are neglected over multiple cooking cycles, they undergo carbonization. They turn into a dark, rock-solid crust that steam alone might not completely dissolve. For these stubborn areas, you need a safe, non-scratch abrasive paste.
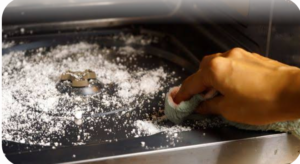
The Baking Soda Alkaline Paste
Baking soda (sodium bicarbonate) is a mild alkali. It excels at breaking down organic proteins and grease while providing just enough physical grit to lift stuck-on food without scratching plastic or stainless steel interiors.
How to Spot-Treat Tough Areas:
-
Form the Paste: In a small dish, mix 3 parts baking soda with 1 part warm water until it forms a consistency resembling thick toothpaste.
-
Apply and Dwell: Smear the paste directly over the burnt patches or yellowed grease rings. Let it sit undisturbed for 15 minutes to chemically loosen the bond.
-
Gentle Agitation: Use a damp, non-scratch scrub sponge to rub the area in a tight circular motion. The crust will begin to flake and dissolve into the paste.
-
Rinse Clean: Wipe the area thoroughly with a fresh, damp cloth to ensure no powdery white residue remains.
3. Odor Elimination: Banish Burnt Smells Permanently
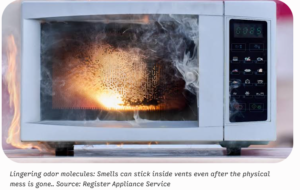
Few things ruin a kitchen’s environment faster than the acrid stench of burnt popcorn or scorched cheese radiating from a microwave. Even when the physical mess is completely gone, volatile organic compounds (VOCs) can remain trapped inside the porous plastic walls and internal ventilation ducts.
To completely clear a foul stench, you need to actively absorb the odor molecules rather than just masking them with artificial air fresheners.
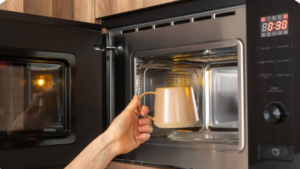
The Best Overnight Odor Absorbers
If a standard steam clean doesn’t clear the air, place one of the following items inside your microwave, close the door, and leave it completely off overnight (8 to 12 hours):
| Odor Absorbing Medium | Primary Benefit | How It Works |
| Fresh Coffee Grounds (Dry) | Strongest odor neutralizer; leaves a rich, pleasant aroma. | Nitrogen in coffee grounds safely isolates and neutralizes carbon-based odors. |
| Activated Charcoal Chunks | Highly porous; completely scentless option. | Actively pulls micro-particles out of the air via a chemical process called adsorption. |
| Open Box of Baking Soda | Readily available; neutralizes both acidic and basic odors. | Creates a chemical balance that pulls foul, unstable molecules out of the air. |
4. Deep Cleaning Steps: A Complete Component Breakdown
To achieve a true, deep sanitation of your appliance, you cannot just look at the walls. You need to break the machine down section by section.
Step 2: Wash the Moving Parts
Carefully remove the glass turntable tray and the plastic roller ring.
-
Wash them in your kitchen sink using warm water and a high-quality, grease-cutting dish soap.
-
If the glass tray has a layer of baked-on film, let it soak in hot, soapy water for 20 minutes before wiping.
-
Note: While most glass trays are dishwasher safe, manual washing prevents accidental chipping.
Step 3: Sanitize the Rubber Door Gasket
The rubber gasket running along the inside edge of the door is critical; it seals the unit to prevent microwave leakage and trap cooking moisture. Over time, grease films and crumbs lodge into the folds of this seal, creating a breeding ground for bacteria.
-
The Safe Method: Dip a microfiber cloth in warm water mixed with a single drop of mild dish soap.
-
Wipe the entire length of the gasket gently.
-
Crucial Warning: Never use harsh vinegar solutions, bleach, or abrasive scrubs directly on thin rubber gaskets. Repeated exposure to strong acids or bases dries out the rubber, causing it to crack, degrade, and compromise the microwave’s seal over time.
Step 4: Polish the Exterior and Control Panel
The handle and touch pad accumulate oils from your fingers every single day.
-
Spray a microfiber cloth with a 50/50 mix of water and rubbing alcohol to wipe down the exterior buttons and glass panel. This cuts through finger grease perfectly without leaving streaks or dripping liquid into the underlying circuit boards.
5. Proactive Maintenance Tips to Keep It Clean Long-Term
The absolute easiest way to clean a microwave is to prevent it from getting dirty in the first place. Incorporate these three professional habits into your kitchen routine:
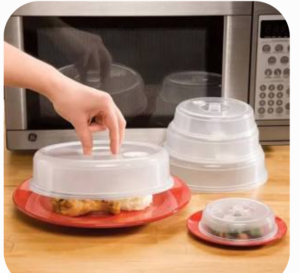
-
The Splash-Shield Rule: Invest in a dedicated, vented silicone or BPA-free plastic microwave plate cover. Alternatively, loosely drape a clean sheet of paper towel over bowls before heating. This completely catches flying grease and popping sauces.
-
The Immediate Humidity Wipe: If you notice a minor splatter after heating food, don’t wait for your weekly cleaning day. Wipe it up immediately with a damp paper towel while the interior is still warm and humid. It takes exactly five seconds now versus ten minutes of scrubbing later.
-
Adjust Your Power Settings: Most food explosions happen because users blast delicate dishes on 100% power. Use medium power settings (50% to 70%) for dairy, dense meats, and reheating leftovers. It heats the food far more evenly and keeps liquids from hitting their violent boiling point.
How Often Should You Clean a Microwave?
📷 Image Suggestion: Weekly and monthly cleaning calendar.
Recommended Schedule
| Task | Frequency |
|---|---|
| Quick wipe | Weekly |
| Steam clean | Monthly |
| Deep clean | Every 2–3 months |
| Odor treatment | As needed |
💡 Key Takeaways for Fast Reference
-
Weekly Routine: Run the Lemon Steam Method (boil for 3–5 minutes, sit for 10 minutes) to effortlessly lift daily film and deodorize.
-
Stubborn Crusts: Tackle hard carbon spots with a baking soda paste left to sit for 15 minutes.
-
Odors: Neutralize severe burnt smells by trapping coffee grounds or activated charcoal inside the closed unit overnight.
-
Gasket Integrity: Clean rubber door seals using mild dish soap and water only—never use harsh acids or chemicals.
🙋 Frequently Asked Questions (FAQs)
Q1: Can I use commercial oven cleaner inside my microwave?
No, absolutely not. You should never spray standard oven cleaners (such as Easy-Off) inside a microwave. The interior walls of microwaves are typically finished with plastic, stainless steel, or porcelain enamel. The harsh, highly caustic chemicals in oven cleaners can chemically burn plastic, pit metal, and ruin the interior. Additionally, toxic chemical residues can lodge in the vents, contaminating your food during future use.
Q2: Why is my microwave turning yellow inside, and can I remove it?
Yellowing is generally caused by vaporized cooking oils and plastic aging from repeated heat exposure. You can significantly lighten or entirely remove these stains by applying a thick baking soda paste, letting it sit for 15 to 20 minutes, and scrubbing gently with a non-scratch sponge.
Q3: Is it safe to run a microwave empty during steam cleaning?
No, never operate your microwave completely empty. Doing so can permanently destroy the internal magnetron tube (the component that creates the heating waves). Without water or food molecules to absorb the energy, the microwaves bounce directly back into the transmitter, causing overheating, sparks, or immediate electrical failure. Always ensure your steam bowl is full of water before hitting start.
Q4: How often should a household microwave be cleaned?
For basic hygiene, give the interior a quick wipe-down once a week with a damp cloth. A deep steam-clean using lemons or vinegar should be executed once a month to prevent thick grease accumulation and ensure proper sanitation.
Q5: What does it mean if my microwave starts sparking during a clean?
If you see sparks, shut down and unplug the unit immediately. Ensure that no steel wool fragments, aluminum foil bits, or metallic twist-ties were accidentally left inside. If the unit is entirely clean and still sparks, the small mica waveguide cover (the small square panel on the interior side wall) may have built up a layer of conductive burnt grease, or the machine has sustained internal component failure and requires professional repair.
Conclusion
Cleaning your microwave doesn’t have to be a dreaded, intensive chore. By stepping away from chemical sprays and utilizing the natural science of steam, citric acid, and baking soda, you can let simple chemistry do the heavy lifting for you. Give your machine a quick five-minute steam treatment today, and enjoy a sparkling, sterile, and highly efficient appliance all year long!


